

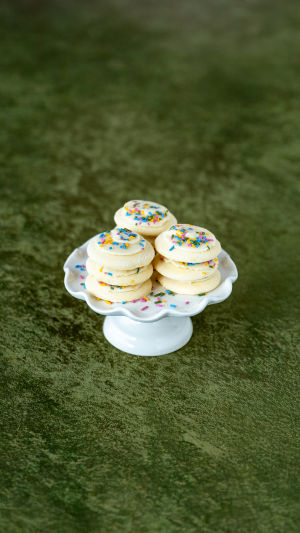
It usually starts with a small plate of plain sugar cookies. They're sweet, buttery, and perfectly fine on their own—but something feels missing. Then comes the icing bag.
With just a few lines, swirls, and dots of colorful sugar icing, those plain circles transform into tiny works of art. That's the magic of iced cookies: they look festive, they taste delightful, and they invite creativity in every step.
<h3>What Makes Iced Cookies Special</h3>
Decorating cookies isn't just about sugar and sprinkles. It's a mix of baking, painting, and a touch of patience. People love iced cookies because they turn a simple treat into a personal gift. A heart with a friend's name, a snowflake at holiday, or pastel flowers for a baby shower—it's edible storytelling.
And the best part is, you don't need to be a professional baker to try it. With a steady hand and the right tools, anyone can learn the craft.
<h3>Essential Ingredients You'll Need</h3>
The process starts in the kitchen. Gather your ingredients carefully, because quality makes a difference.
1. For the cookies:
- 2 ½ cups all-purpose flour
- ¾ cup unsalted butter (softened)
- ¾ cup granulated sugar
- 1 egg
- 1 teaspoon vanilla extract
- ½ teaspoon baking powder
- Pinch of salt
2. For the royal icing:
- 3 cups powdered sugar
- 2 tablespoons meringue powder (or pasteurized egg whites)
- 5–6 tablespoons warm water
- Gel food coloring in your choice of shades
These simple ingredients give you a blank canvas that's sturdy enough for icing but still soft when you bite in.
<h3>Step-by-Step: Baking the Perfect Base</h3>
1. In a bowl, cream the butter and sugar until light and fluffy.
2. Beat in the egg and vanilla extract until smooth.
3. In a separate bowl, whisk flour, baking powder, and salt. Slowly add to the wet mixture.
4. Form the dough into a disk, wrap it, and chill in the fridge for at least an hour. This prevents spreading.
5. Roll out the dough on a lightly floured surface, about ¼ inch thick.
6. Cut shapes using cookie cutters—stars, hearts, circles, or seasonal designs.
7. Bake at 350°F (175°C) for 8–10 minutes until edges are lightly golden.
8. Let cookies cool completely before icing. Decorating warm cookies will melt your designs.
<h3>Mixing and Coloring the Icing</h3>
Royal icing is the star of the show. It dries smooth, shiny, and firm, making it perfect for detailed work. Start by beating the powdered sugar, meringue powder, and water until stiff peaks form. For outlining, you want a slightly thicker consistency. For flooding (filling in large areas), add a few more drops of water to thin it out.
Divide the icing into small bowls and stir in gel food coloring. Gel works better than liquid because it doesn't water down the icing. Keep a damp towel over bowls you're not using—royal icing dries fast.
<h3>Basic Decorating Techniques</h3>
Now comes the fun part. Start with simple designs before moving on to complex patterns.
1. Outlining: Use a piping bag with a small round tip to draw the cookie's edges. This creates a barrier for flooding.
2. Flooding: Fill the inside with thinner icing. Use a toothpick to spread it into corners and pop air bubbles.
3. Wet-on-wet: Add dots or lines of contrasting icing while the base is still wet, then swirl gently for marbled effects.
4. Detail work: Once the base dries, pipe fine lines, lettering, or tiny flowers on top for extra charm.
<h3>Helpful Tips for Beginners</h3>
Decorating cookies can feel intimidating at first, but a few tricks make it easier:
• Keep your icing bags upright in tall glasses when not in use.
• Practice piping lines on parchment paper before going to the cookie.
• If your icing spreads too much, it's too thin—add more powdered sugar.
• If it clogs the tip, it's too thick—add a drop of water at a time.
• Let cookies dry uncovered for several hours or overnight to set completely.
<h3>Creative Design Ideas</h3>
Once you master the basics, the possibilities are endless. Try pastel flowers for spring, pumpkins with orange and green icing for autumn, or snowflakes dusted with edible glitter for winter. For birthdays, pipe initials or age numbers. For weddings, use white and gold with delicate lace patterns.
Cookies don't just taste good; they become personalized keepsakes.
<h3>Why People Love the Process</h3>
Decorating cookies isn't just about the end result—it's about the experience. Kids love squeezing icing bags and watching colors spread across their cookies. Young people find it relaxing, almost like coloring books for grown-ups. Families often turn it into a holiday tradition, filling the kitchen with laughter and the sweet smell of sugar.
<h3>A Sweet Final Thought</h3>
Iced cookies are proof that food can be more than fuel—it can be art, joy, and memory rolled into one. The next time you're baking, try slowing down and turning plain dough into a colorful masterpiece. You'll be surprised how satisfying it feels when someone takes a bite, smiles, and says, "This is almost too pretty to eat."


