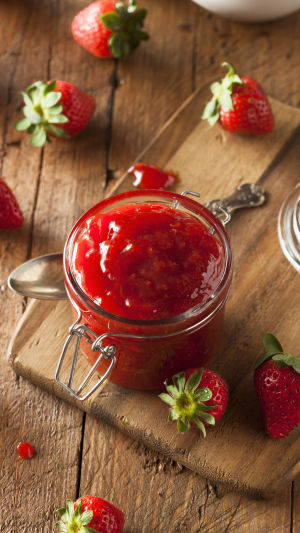
Making strawberry jam at home is a rewarding experience.
Imagine opening a jar of fresh, sweet strawberry jam on a cold winter morning, bringing a taste of summer to your table.
With a few simple steps and ingredients, you can capture that delicious flavor and enjoy it year-round.
This guide will take you through each step of the jam-making process, with some tips and tricks to make it easy and fun.
<h3>1. Gather Your Ingredients</h3>
The best jams start with the best ingredients. Here's what you'll need:
<b>- Fresh Strawberries</b> – About 2 pounds, ideally ripe and juicy.
<b>- Sugar</b> – 2 cups, though you can adjust to taste.
<b>- Lemon Juice</b> – 2 tablespoons for flavor and as a natural preservative.
Using fresh strawberries ensures that your jam has a rich, fruity flavor. If possible, pick strawberries at their peak ripeness, as these will be the sweetest and most flavorful.
<h3>2. Prepare the Strawberries</h3>
Start by washing the strawberries thoroughly and removing the stems. You can leave them whole, but chopping them into smaller pieces speeds up the cooking process and helps release the juices. Some people like to mash the strawberries slightly to make the jam smoother, while others prefer leaving chunks for a more textured result.
<h3>3. Cook the Strawberries</h3>
Now, place the strawberries in a large saucepan over medium heat. Add the sugar and lemon juice, and stir to combine. As the mixture heats, the strawberries will start releasing their juices, creating a syrupy base.
<b>Tips:</b>
<b>- Stir Regularly:</b> Stirring prevents the jam from sticking to the bottom and ensures even cooking.
<b>- Skim Foam:</b> You might notice some foam forming on top. Skimming this off will give your jam a clearer appearance.
<h3>4. Test for Doneness</h3>
As the jam simmers, it will thicken. A common way to test for doneness is the plate test:
1. Place a small plate in the freezer for a few minutes.
2. Drop a small amount of jam onto the cold plate.
3. Let it sit for a minute, then run your finger through it. If the jam holds its shape and wrinkles slightly, it's ready. If it's still runny, cook a bit longer and test again.
How to Make Strawberry Jam!
Video by Preppy Kitchen
<h3>5. Canning the Jam</h3>
Once your jam has reached the desired consistency, it's time to can it for long-term storage. Here's how:
<b>1. Sterilize the Jars:</b> Boil the jars and lids in a large pot of water for 10 minutes. This step prevents bacteria from spoiling your jam.
<b>2. Fill the Jars:</b> Carefully ladle the hot jam into the sterilized jars, leaving about a quarter-inch of space at the top. Wipe any spills on the jar rim before placing the lid on.
<b>3. Seal the Jars:</b> Tightly screw the lids onto the jars and submerge them in boiling water for 5-10 minutes to create a vacuum seal.
This method of canning will allow your jam to last up to a year when stored in a cool, dark place. Once opened, keep the jam in the fridge and consume it within a few weeks.
<h3>6. Enjoy Your Homemade Jam!</h3>
Congratulations! You've made delicious strawberry jam from scratch. Spread it on toast, add a dollop to yogurt, or use it as a filling in pastries. Homemade jam also makes a wonderful gift, especially when packed in pretty jars with ribbons or labels.
<b>Storage Tip:</b> Label each jar with the date it was made. This way, you'll always know how fresh your jam is.
<h3>Tips for Customizing Your Jam</h3>
The best part of homemade jam is that you can get creative! Here are some ideas for customizing your strawberry jam:
<b>- Add Vanilla:</b> Stir in a teaspoon of vanilla extract for a sweet, floral note.
<b>- Spice It Up:</b> A pinch of cinnamon or cardamom can give your jam a warm, spicy flavor.
<b>- Mix Fruits:</b> Combine strawberries with other fruits like rhubarb or blueberries for a unique blend.
Making strawberry jam at home may take a bit of time, but the result is well worth the effort. You get to enjoy the taste of real strawberries all year long, and there's nothing more satisfying than knowing you made it yourself.


